I've been using Philips Hue lightbulbs in my house for a few years. The hardware has been reliable. The software on the other hand is not the best. Being tied to a mobile app as the only source of control can be cumbersome. While my Philips Hue bulbs are also connected to Google Home, I don't have one set up in every room of the house. Plus, the Philips Hue app is lackluster when it comes to making automation rules. Most of the time the GPS-based triggers do not work properly.
I've also been wanting to create more home automation – especially with my lights. Being able to dim or turn off the lights completely when no one is in the room is extremely useful and can save a few dollars on the electricity bill. Buying a Philips Hue motion sensor is an option but they are quite expensive ($45-65USD). There are many other cheaper options available but that would require buying another gateway and maybe even a whole set of new lights since there's a lack of cross-brand support.
The IoT market is very segmented. At the lowest level, there are several competing wireless protocols available; Zigbee, Z-Wave, Lora, and WiFi to name a few. Sticking with one protocol also presents compatibility issues directly resulting from proprietary implementation across different brands. A Philips Hue hub/bridge will work with Hue lightbulbs and a handful of partnered brands. Even with partner brand support, there's a high chance of limited features when mixing. A typical off-the-shelf smart home today means multiple proprietary hardware and cloud services that do not guarantee direct integration with one another. This makes for a very expensive setup and requires looking for workarounds and expensive third-party services to connect them all, like Google Home and Samsung Smarthings. Luckily, Home Assistant falls into the cost effective solution if you're willing to put in the work to set it up.
With an underutilized thin-client acting as a local DNS and Adblock (Pi-hole) server, Home Assistant seems like the perfect solution to all of the above-mentioned issues by eliminating the need to buy into different IoT ecosystems. Home Assistant not only acts as a unifying abstraction layer, but it also has a large community-driven set of tools and plugins to accomplish tasks such as creating automation rules for supported devices.
Getting Started

Bill of Materials
- Zigbee enabled devices (pre-existing or just to test). e.g. Light bulbs, motion sensors, temperature sensors, etc.
- Zigbee coordinator. This could be a USB-dongle like the ConBee II, or SONOFF Zigbee 3.0. For this project, I chose the Sonoff ZBBridge. At the time of writing, the Pro version of the Sonoff ZBBridge was released a few weeks ago (it supports up to 128 devices).
- (Optional) FTDI Programmer. Necessary if you want to use the Sonoff ZBBridge route to load a custom firmware called Tasmota.
- A dedicated server with Docker installed. This can be a Rapsberry Pi or an old computer. The idea is to reduce power consumption, so low-powered is important. The Dell Wyse 5070 thin client I am using has a Pentium Silver J5005 which only consumes roughly 10W max. If you are planning on using a Raspberry Pi, then the Home Assistant Pi image is better suited than a Docker setup (you can still use the configuration files in this guide).
- If you're using an Intel based system, I highly recommend Intel Clear Linux Server. It's highly optimized for Intel CPUs.
- Reference: https://zigbee.blakadder.com/ is a great place to check device support for Zigbee2MQTT or ZHA (alternative Zigbee integration for Home Assistant).
I chose to use the Sonoff ZBBridge instead of the USB Zigbee dongle because my server is sitting in a closet at one end of the house. While Zigbee is a mesh protocol, I wasn't too sure if there would be a strong signal to the first device. Plus, having an untethered coordinator makes it easier to place it almost anywhere in the house.
Sonoff ZBBridge is an ESP MCU based controller that's shipped with Sonoff's firmware for their IoT managed solution. Thankfully there are pin-outs on the board that allows for reflashing. You can either choose ESPHome or Tasmota. I went with Tasmota.
Follow the guides below to flash your Sonoff ZBBridge before proceeding:
- Sonoff ZBBridge Tasmota flashing guide
- Sonoff ZBBridge Pro Tasmota flashing guide (source via Github)
Tasmota flashing and setup are required before proceeding.
Flashing will be a two step process: 1) Flash the ESP MCU with Tasmota 2) Flash a custom Zigbee module firmware once Tasmota is up and running. Lastly, remember to follow the guide's configuration template to set it up for Zigbee2Tasmota. ZHA (Home Assistant Zigbee plugin) is another alternative that provides a direct connection without requiring an MQTT broker such as Eclipse Mosquitto. However, from my experience, ZHA has less device support and a bit complicated to custom add new devices.
Once you've completed the step above:
- Make note of your Tasmota Sonoff ZBBridge's IP address.
- Update your router's DHCP settings to make the IP address static for the Tasmota Sonoff ZBBridge. Without this configuration, your setup will break when Tasmota's IP address changes.
On your server, clone the project template:
git clone https://github.com/foureight84/ha_zigbee_docker.git && cd ha_zigbee_dockerDocker
Templates repository is located here: https://github.com/foureight84/ha_zigbee_docker
If you are already using Traefik then modifications will need to be made before running the docker-compose.yaml / docker-swarm.yaml. The same applies to importing the templates into Portainer.
The scaffold Docker volumes folders adhere to "iot" as the service name for the docker instances. If you wish to use a different name, make sure to edit the foler name prefix accordingly.
Docker Swarm Setup
Skip to the next section if you're using standalone Docker.
- Create "traefik" overlay network
docker network create --driver=overlay --attachable --subnet=48.84.0.0/16 --gateway=48.84.0.1 traefikMake sure to update
iot_homeassistant\_data\configuration.yamlif you set a different subnet for the "traefik" network. This is necessary to access Home Assistant's web UI.
- Update
iot_zigbee2mqtt\_data\configuration.yamlwith your Tasmota Sonoff ZBBridge's IP address
serial:
  port: tcp://<<tasmota ip address>>:8888 #update to match your static ip for Tasmota Sonoff ZBBridge
adapter: ezsp- Copy configuration to docker volumes storage location:
sudo cp -a iot_* /var/lib/docker/volumes/- Run the Home Assistant stack:
docker stack deploy -c docker-swarm.yaml iotStack name needs to match volumes folders' prefix "iot_". Rename volumes folder if you wish to use a different stack name.
Docker Standalone Setup
Ignore this step if you are using Docker Swarm.
- Update
iot_zigbee2mqtt\_data\configuration.yamlwith your Tasmota Sonoff ZBBridge's IP address
serial:
  port: tcp://<<tasmota ip address>>:8888 #update to match your static ip for Tasmota Sonoff ZBBridge
adapter: ezsp- Copy configuration to docker volumes storage location:
sudo cp -a iot_* /var/lib/docker/volumes/- Run the Home Assistant stack:
docker-compose -p iot up -dDNS
You will need to create DNS entries in your router to access the running services. For my instance, 192.168.1.2 is my Docker server and these are my router DNS records:
192.168.1.2 traefik.home
192.168.1.2 home-assistant.home
192.168.1.2 node-red.home
192.168.1.2 zigbee2mqtt.home
Home Assistant Initial Setup
- Browse to
http://home-assistant.homeand create your account. At the end of the account creation wizard, you should see a screen similar similar to this:
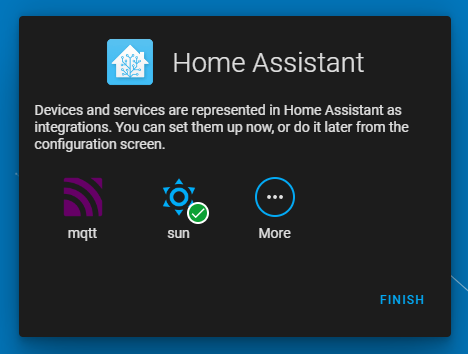
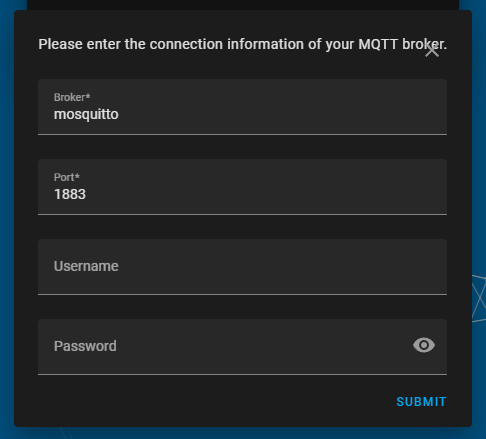
- Click on
mqttandmosquittoas the broker and submit. You should get a "Success" confirmation. Instead of using the Docker IP for the Eclipse Mosquitto container, we are providing it with the hostname instead.
Installing HACS (Home Assistant Community Store)
HACS (Home Assistant Community Store) as the name suggests, this is a repository of community developed plugins for Home Assistant. While there are well maintained plugins, they are unofficially supported. Be aware of this when installing any plugin as it may cause unwanted behaviors with Home Assistant.
We will need HACS in order to complete the Node-RED integration.
A Github account is required to install HACS.
Why?
HACS uses the GitHub API to gather information about all available and downloaded repositories. This API is rate limited to 60 requsets every hour for unauthenticated requests, which is not enough. So HACS needs to make authenticated requests to that API. (source)
- You'll need to go inside the Home Assistant container:
docker exec -it $(docker ps -q -f name=iot_homeassistant) bash- Once inside the Home Assistant container:
wget -O - https://get.hacs.xyz | bash -- Restart Home Assistant from the web UI (http://home-assistant.home) by going to
Settings > System > Restart.
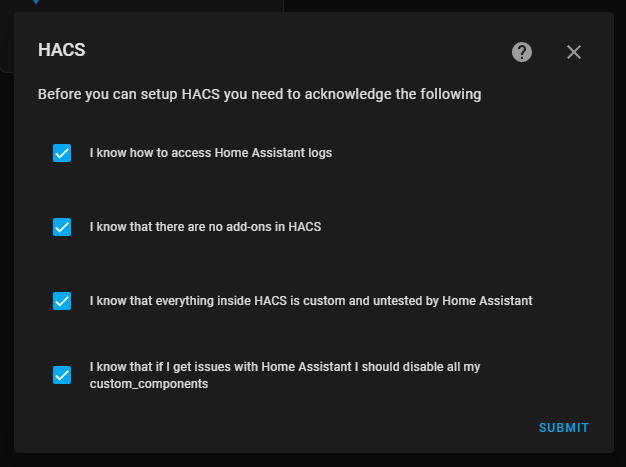
- After Home Assistant restarts, complete the installation by adding the HACS integration. To do so, go to
Settings > Device & Services > + Add Integrationand typeHACS. You will need to acknowledge all the checkboxes and follow the instruction to add HACS to your Github account.
You will see HACS as one of the left-menu items in the Home Assistant web UI.
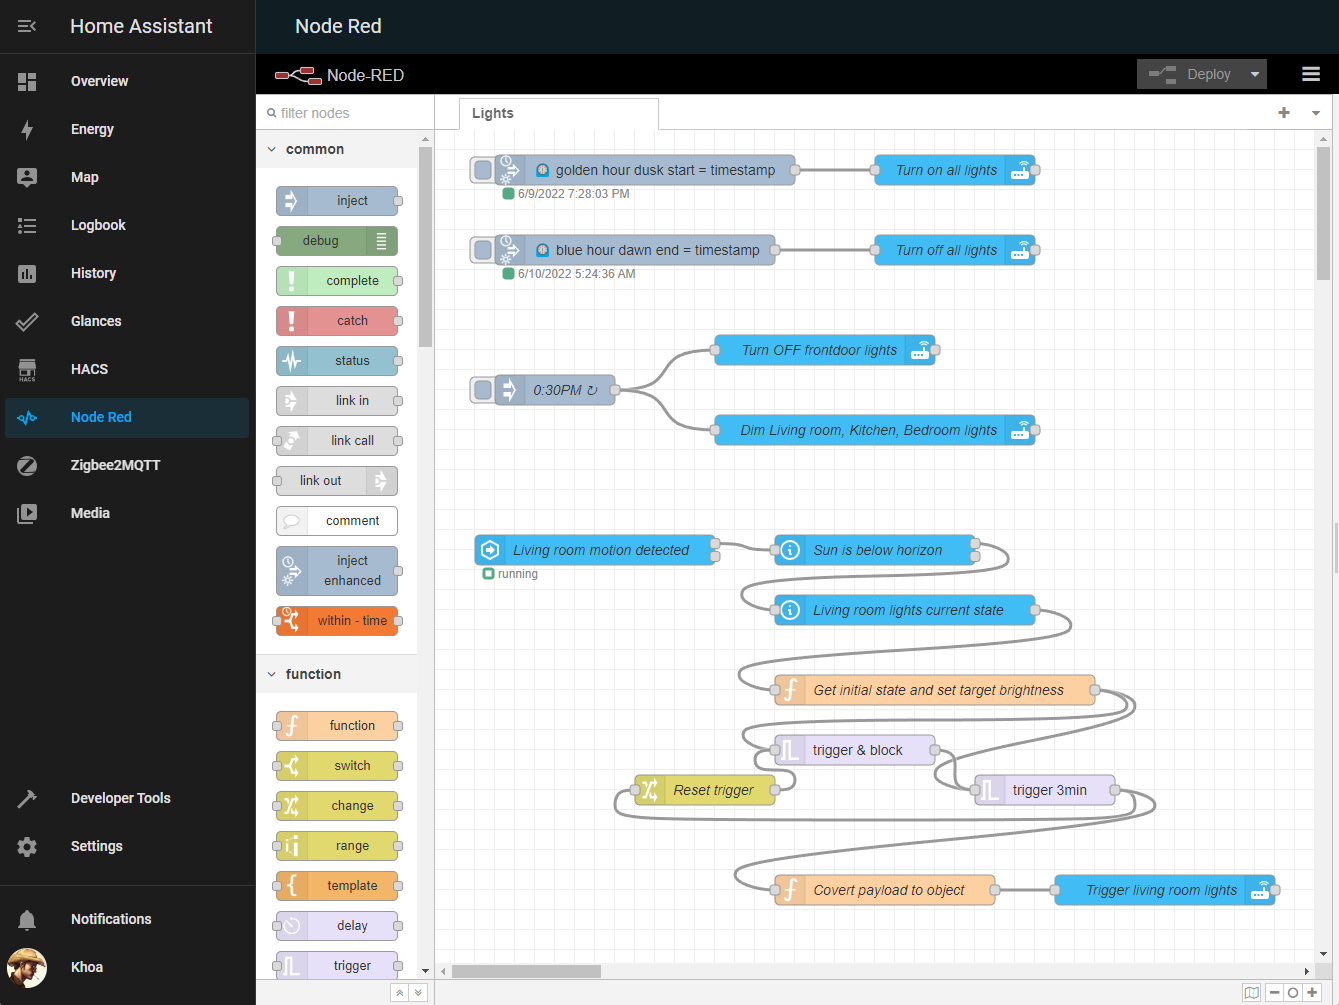
Setting up Node-RED for creating Automation Rules
Node-RED is a flow-based development tool for visual programming. We will be installing specific a community developed "Palette" for Home Assistant.
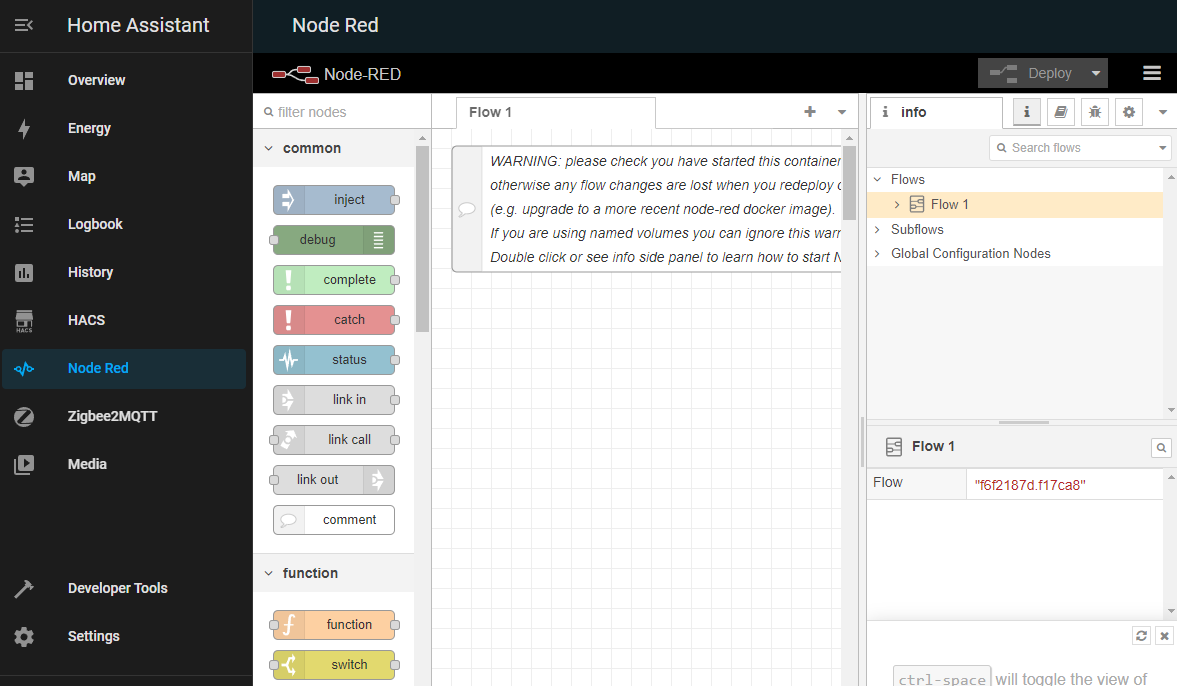
- From the left-menu in the Home Assistant web UI, click on
Node Red.
Node Red and Zigbee2MQTT menu items are custom added via the Home Assistant
configuration.yaml. iframe Panel documentation
These are essentially iframe links to our Node-RED and Zigbee2MQTT web UI instances.
- Access the "Palette Manager" by pressing
alt + shift + por go to the hamburger menu on the top right of the iframe then chooseManage palette. - Click on the
Installtab and search forhome-assistantand look fornode-red-contrib-home-assistant-websocket. - After the palette installs, scroll to the bottom of the Node-RED nodes list on the left and you should see the
home assistantsection with all of the associated nodes. - Drag the 'API' node into the flow workspace and double-click to edit its properties.
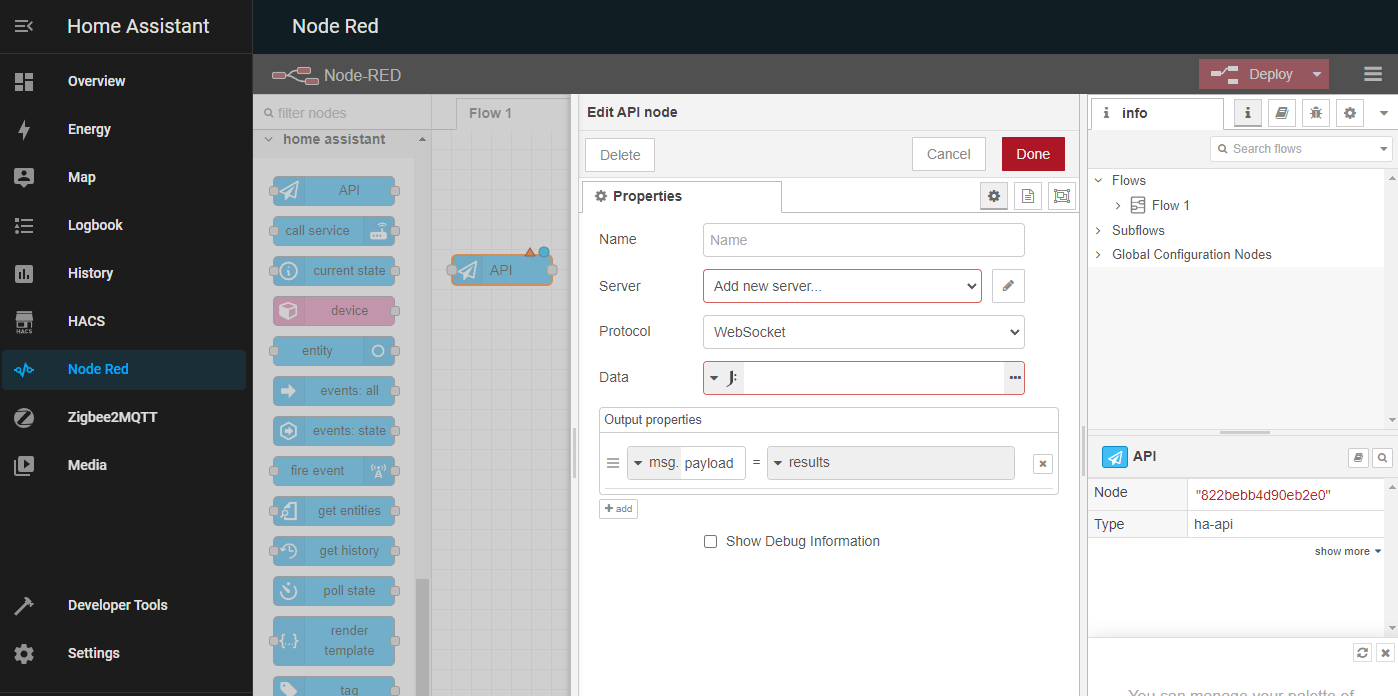
- Open a new browser tab and head to your Home Assistant web UI (http://home-assistant.home). We will be creating a long-lived token for Node-RED to connect with HA. Click on your profile on the left-menu and scroll to the bottom. Click
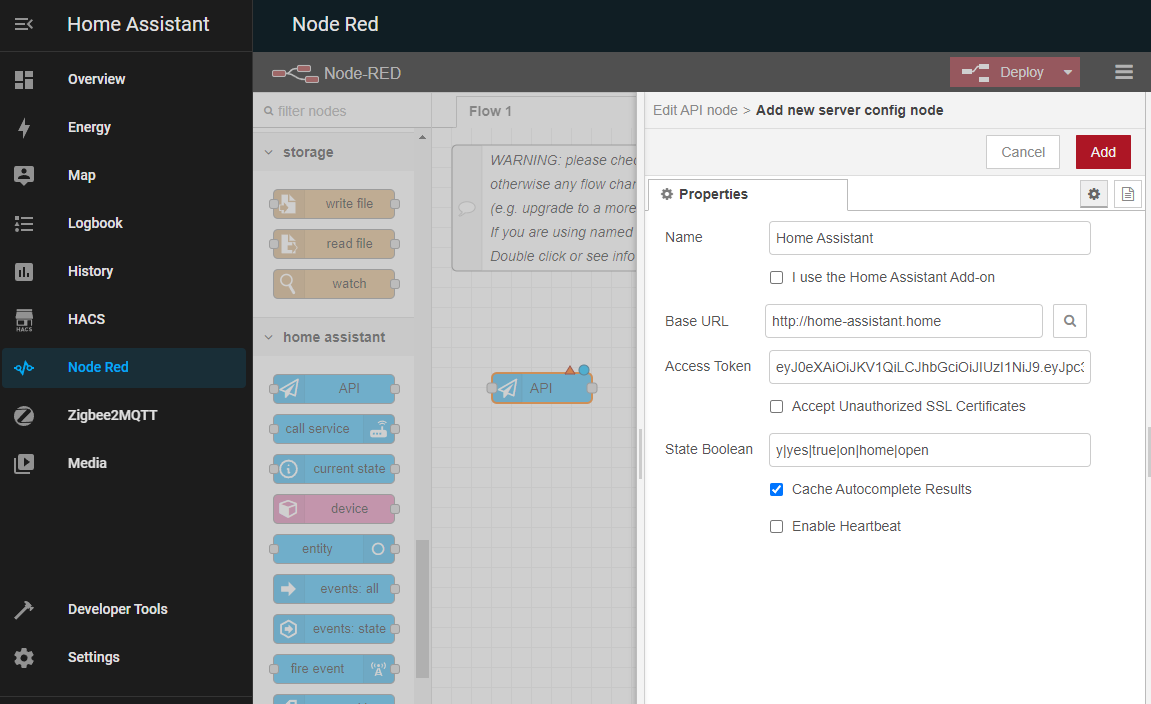
Create Tokenand call itNode RED. Copy the entire token string that should look like this:eyJ0eXAiOiJKV1QiLCJhbGciOiJIUzI1NiJ9.eyJpc3MiOiJlNmY1Nzk5YjAzNjg0MjY1ODRkYTc5Yjc0YTVhMTI1ZCIsImlhdCI6MTY1NDgwMTM4NiwiZXhwIjoxOTcwMTYxMzg2fQ.vjbD8T378Da7nMzgAKotVbzMd-77pAVGI6c7wfcKf6U - Go back to the HA tab with Node-RED opened with the API node properties menu. Click to add new server. Fill in
http://home-assistant:8123for Base URL field and paste your access token.
- After the server has been added, the API node can be deleted. Make sure to click
Deployto save your configuration.
You're all set to create automation rules.
Pairing New Zigbee Devices
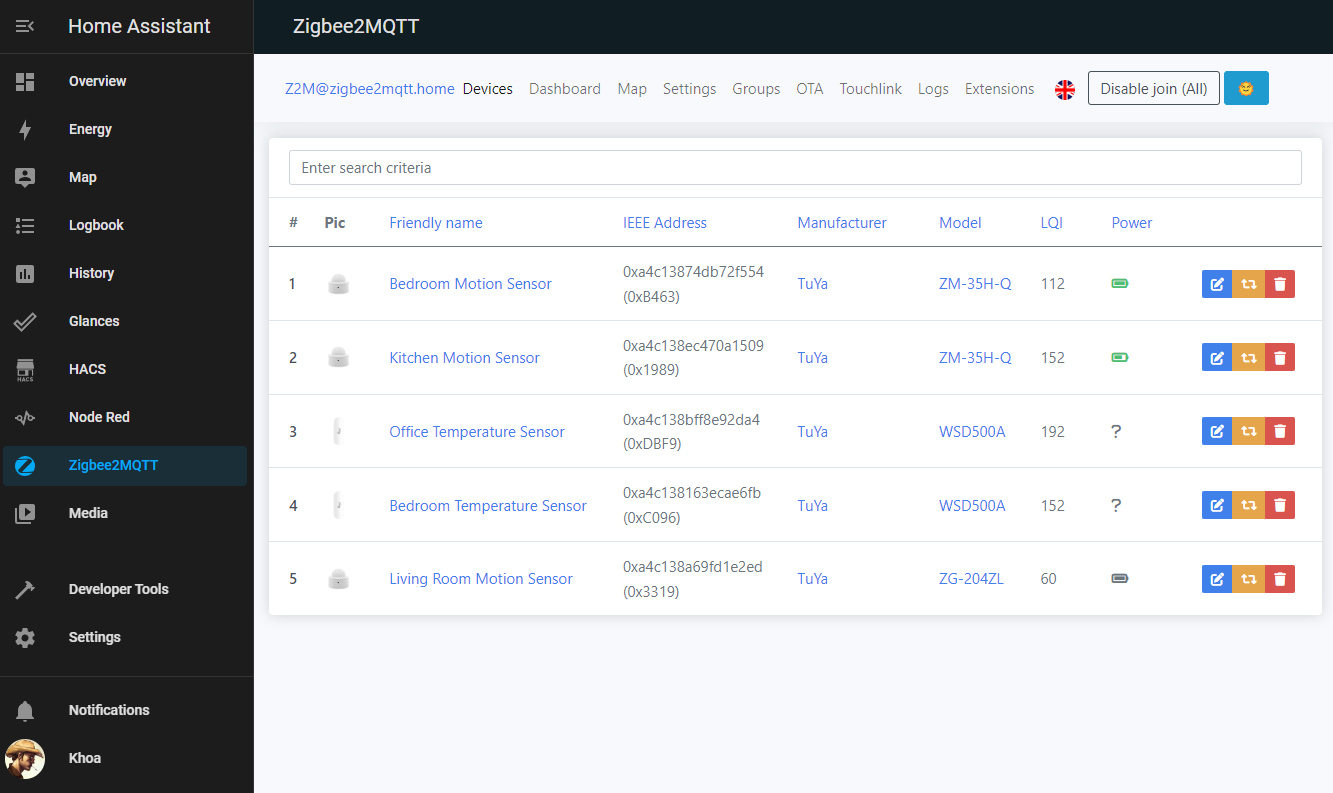
- In your HA web UI, click on the
Zigbee2MQTT. By default via theiot_zigbee2mqtt\_data\configuration.yamlall Zigbee devices in pairing mode will be allowed to join. This can disabled from the Zigbee2MQTT (top-right button). - Put your device into pairing Mode. Depending on the device, it will either be holding down the
resetbutton on the device or turning a switch on and off in combination for light bulbs. See manufacturer instructions for details.
You will see the device show up in Zigbee2MQTT after a few seconds after entering pairing mode. You'll want to name the device appropriately.
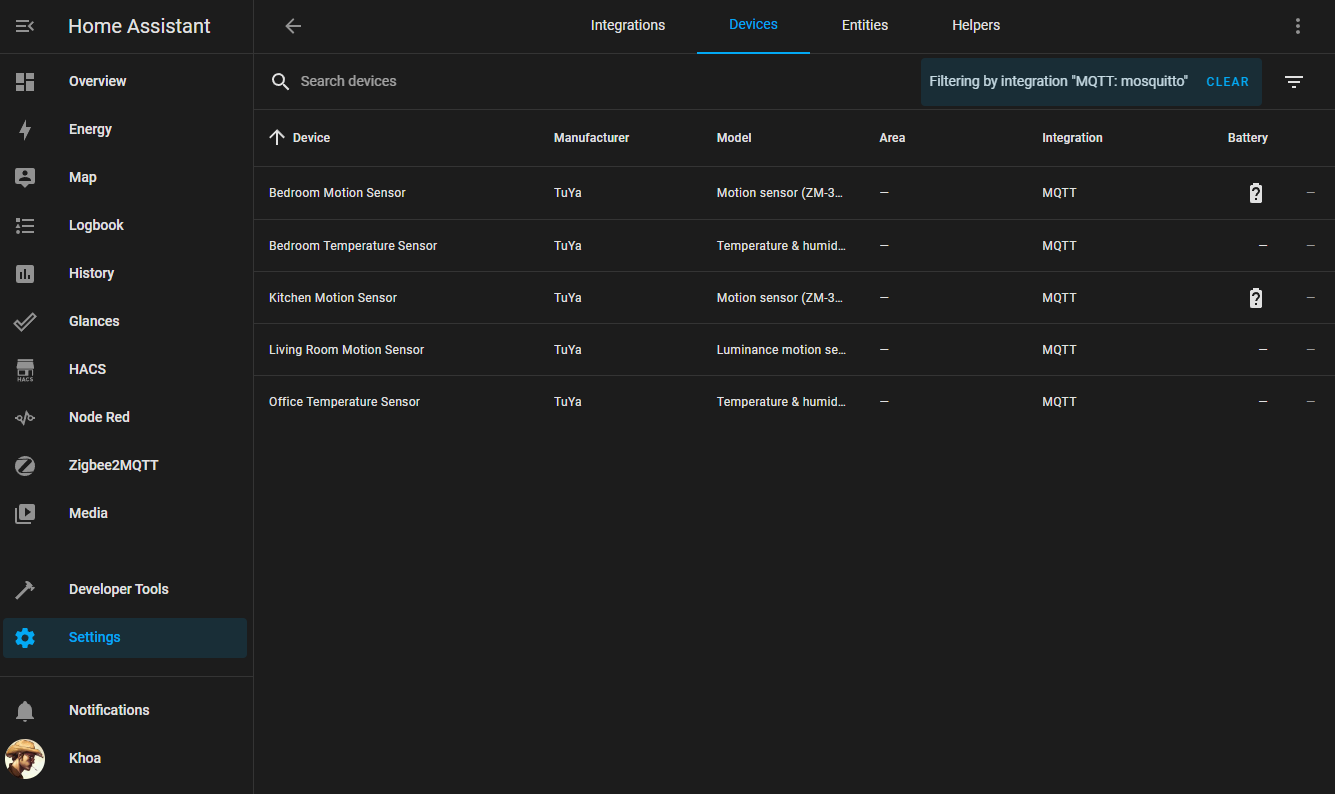
These devices should also appear in Home Assistant under the Settings > Devices & Services > mosquitto MQTT.
Home Assistant also has an Android and iOS companion app that provides additional tracking such as your location. All of this data is fed to your local instance allowing for GPS based automation rules such as turn the lights on when coming home at night, or setting up motion and time based light triggering.
In the next guides, I'll walk through WireGuard VPN setup to maintain a tunnel to your home network to access Home Assistant without exposing it to the public internet.